Dear Fellow Basement Scientists,
Here we are, placing the last finishing touches on the entrance to the wind tunnel. This is pretty exciting! We are discussing today what is known at the honeycomb. I very briefly mentioned this part of the project in Wind Tunnel Design Overview, but now we will discuss its purpose and construction.
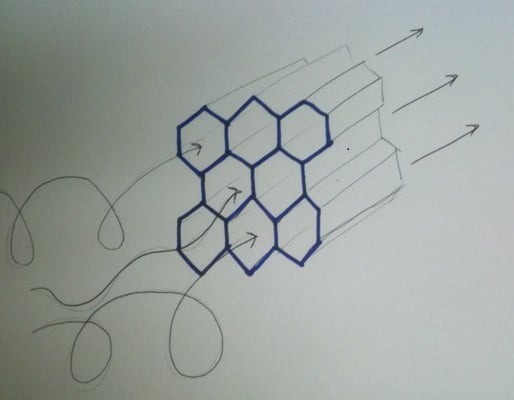
So, if you remember, the purpose of the bell mouth entrance is to reduce all the whirly-twirly turbulence coming into the test section. Reducing this turbulence increases the accuracy and consistency of lift and drag measurements. Well, believe it or not, despite all our valiant efforts on the bell mouth, there is still turbulence in the flow. Bummer! Well, no worries because we can simply install a honeycomb to help us out (as a note, there is always some turbulence in this flow, we are just reducing it as much as possible). A honeycomb consists of lots of little tubes. These tubes kill turbulence because there can’t be big swirls in a little tube. Here is a highly technical drawing laying out the details of this complicated phenomenon:
So, honeycomb. What in the world are we going to use to make this. I can’t just go to my neighborhood beehive because that would be rude to steal from the bees. Secondly, we don’t want to make this out of wood, because it is far to intricate to be practical. We need to buy something that will suit our needs. We must be creative here and keep our eyes peeled for anything that will work.
Times like these remind me of working on a difficult puzzle and looking for that one specific piece. Often I have an image in my mind for what the piece should look like given the box cover and surrounding pieces. It often turns out, however, that the piece looks very little like what I have imagined, (which makes puzzles difficult). Not until I put the piece into the puzzle does it make sense with the rest. Well, we are looking for the honeycomb puzzle piece, and the image in or heads for what we need, may not actually be what would work. So lets be creative and try to find what is available that can fit our goal. Well, to save the drama, I found it: fluorescent light covers. Granted, it is not hexagonal, but it will do just fine. Here is a picture.

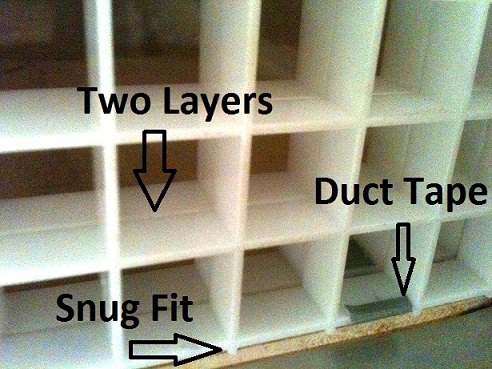
I acquired one sheet of our florescent light cover honeycomb, about 2×4 feet which is plenty. There is a rule of thumb for how long the honeycomb needs to be compared to the tube diameter. Unfortunately, I forgot it. I do know it should be at least twice as long as each grid is tall. Therefore I am going to install two layers of the light covers.
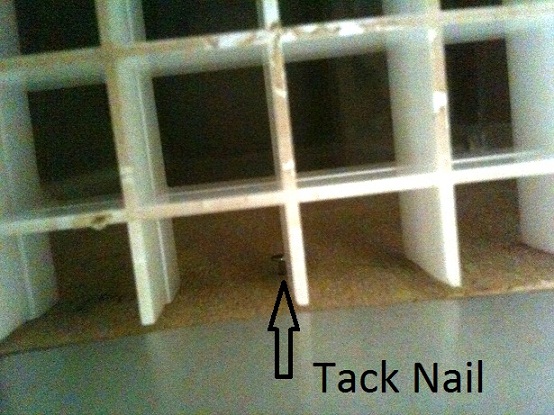
With the test section dimensions known, cut out two pieces to fit inside. Cut it in such a way so that the two pieces match when inserted. Also, cut the honeycomb a little too large and sand the ends down to ensure a snug fit. To hold them in place, I put a few tack nails inside the test section so their heads would butt up against the honeycomb holding it in place. Lastly, I used duct tape in a few locations to keep the two pieces together. Slide your honeycomb in and there you go.
What fun. The entrance side is done, great work! On to the next!
Best Regards,
Ben Washington